Gold nail art represents luxury, elegance, and timeless sophistication, making it one of the most versatile choices for manicures across every season and occasion.
Whether you love a barely-there gold accent or a bold, high-shine statement, gold instantly elevates your nails into something special. From soft, minimal looks to intricate, artistic designs, gold adapts beautifully to every mood.
Explore these stunning gold nail art ideas, ranging from delicate elegance to dramatic glamour, and discover a style that perfectly matches your aesthetic.
Delicate Gold Leaf Elegance


Soft nude nails paired with delicate gold leaf accents create a refined, minimalist look that feels effortlessly chic.
Creating the Design
This style offers subtle luxury, perfect for everyday wear, weddings, or spring celebrations.
Step 1: Prepare the Base
Apply two even coats of a nude or sheer polish, allowing it to dry fully for a smooth foundation.
Step 2: Apply the Gold Leaf
Using tweezers, gently place small, irregular gold leaf pieces onto slightly tacky polish.
Step 3: Seal the Design
Finish with a glossy top coat to lock in the gold and enhance shine.
Finishing Touches
– Keep gold leaf limited to one or two accent nails
– Add tiny gold micro-dots for extra detail
– File nails into almond or rounded shapes for softness
Why It Works
The nude base keeps the look wearable, while the gold leaf adds quiet elegance. It’s timeless, balanced, and effortlessly luxurious.
Bold Gold Chrome Glamour
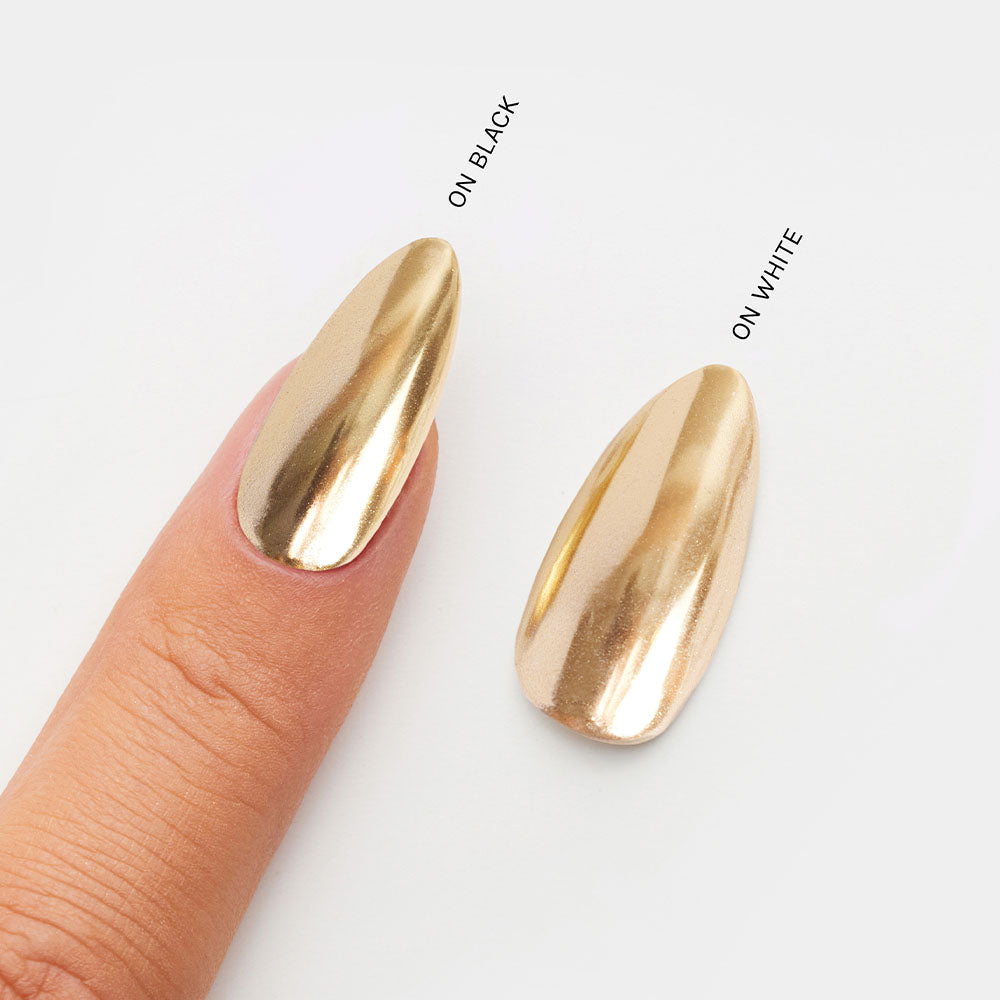

Mirror-like gold chrome nails deliver confidence, shine, and unapologetic glamour.
Creating the Design
This look is perfect for special occasions or when you want maximum impact.
Step 1: Prepare the Base
Apply a black or nude polish base and let it dry completely.
Step 2: Apply Chrome Powder
Rub gold chrome powder over the nail using a sponge applicator until fully reflective.
Step 3: Seal the Design
Finish with a clear top coat to protect and intensify the shine.
Finishing Touches
– Add small studs on one accent nail
– Reapply top coat every few days
– Wear gloves during chores
Why It Works
The reflective finish captures light beautifully, making this design bold, modern, and undeniably luxurious.
Dramatic Black and Gold Marble Masterpiece
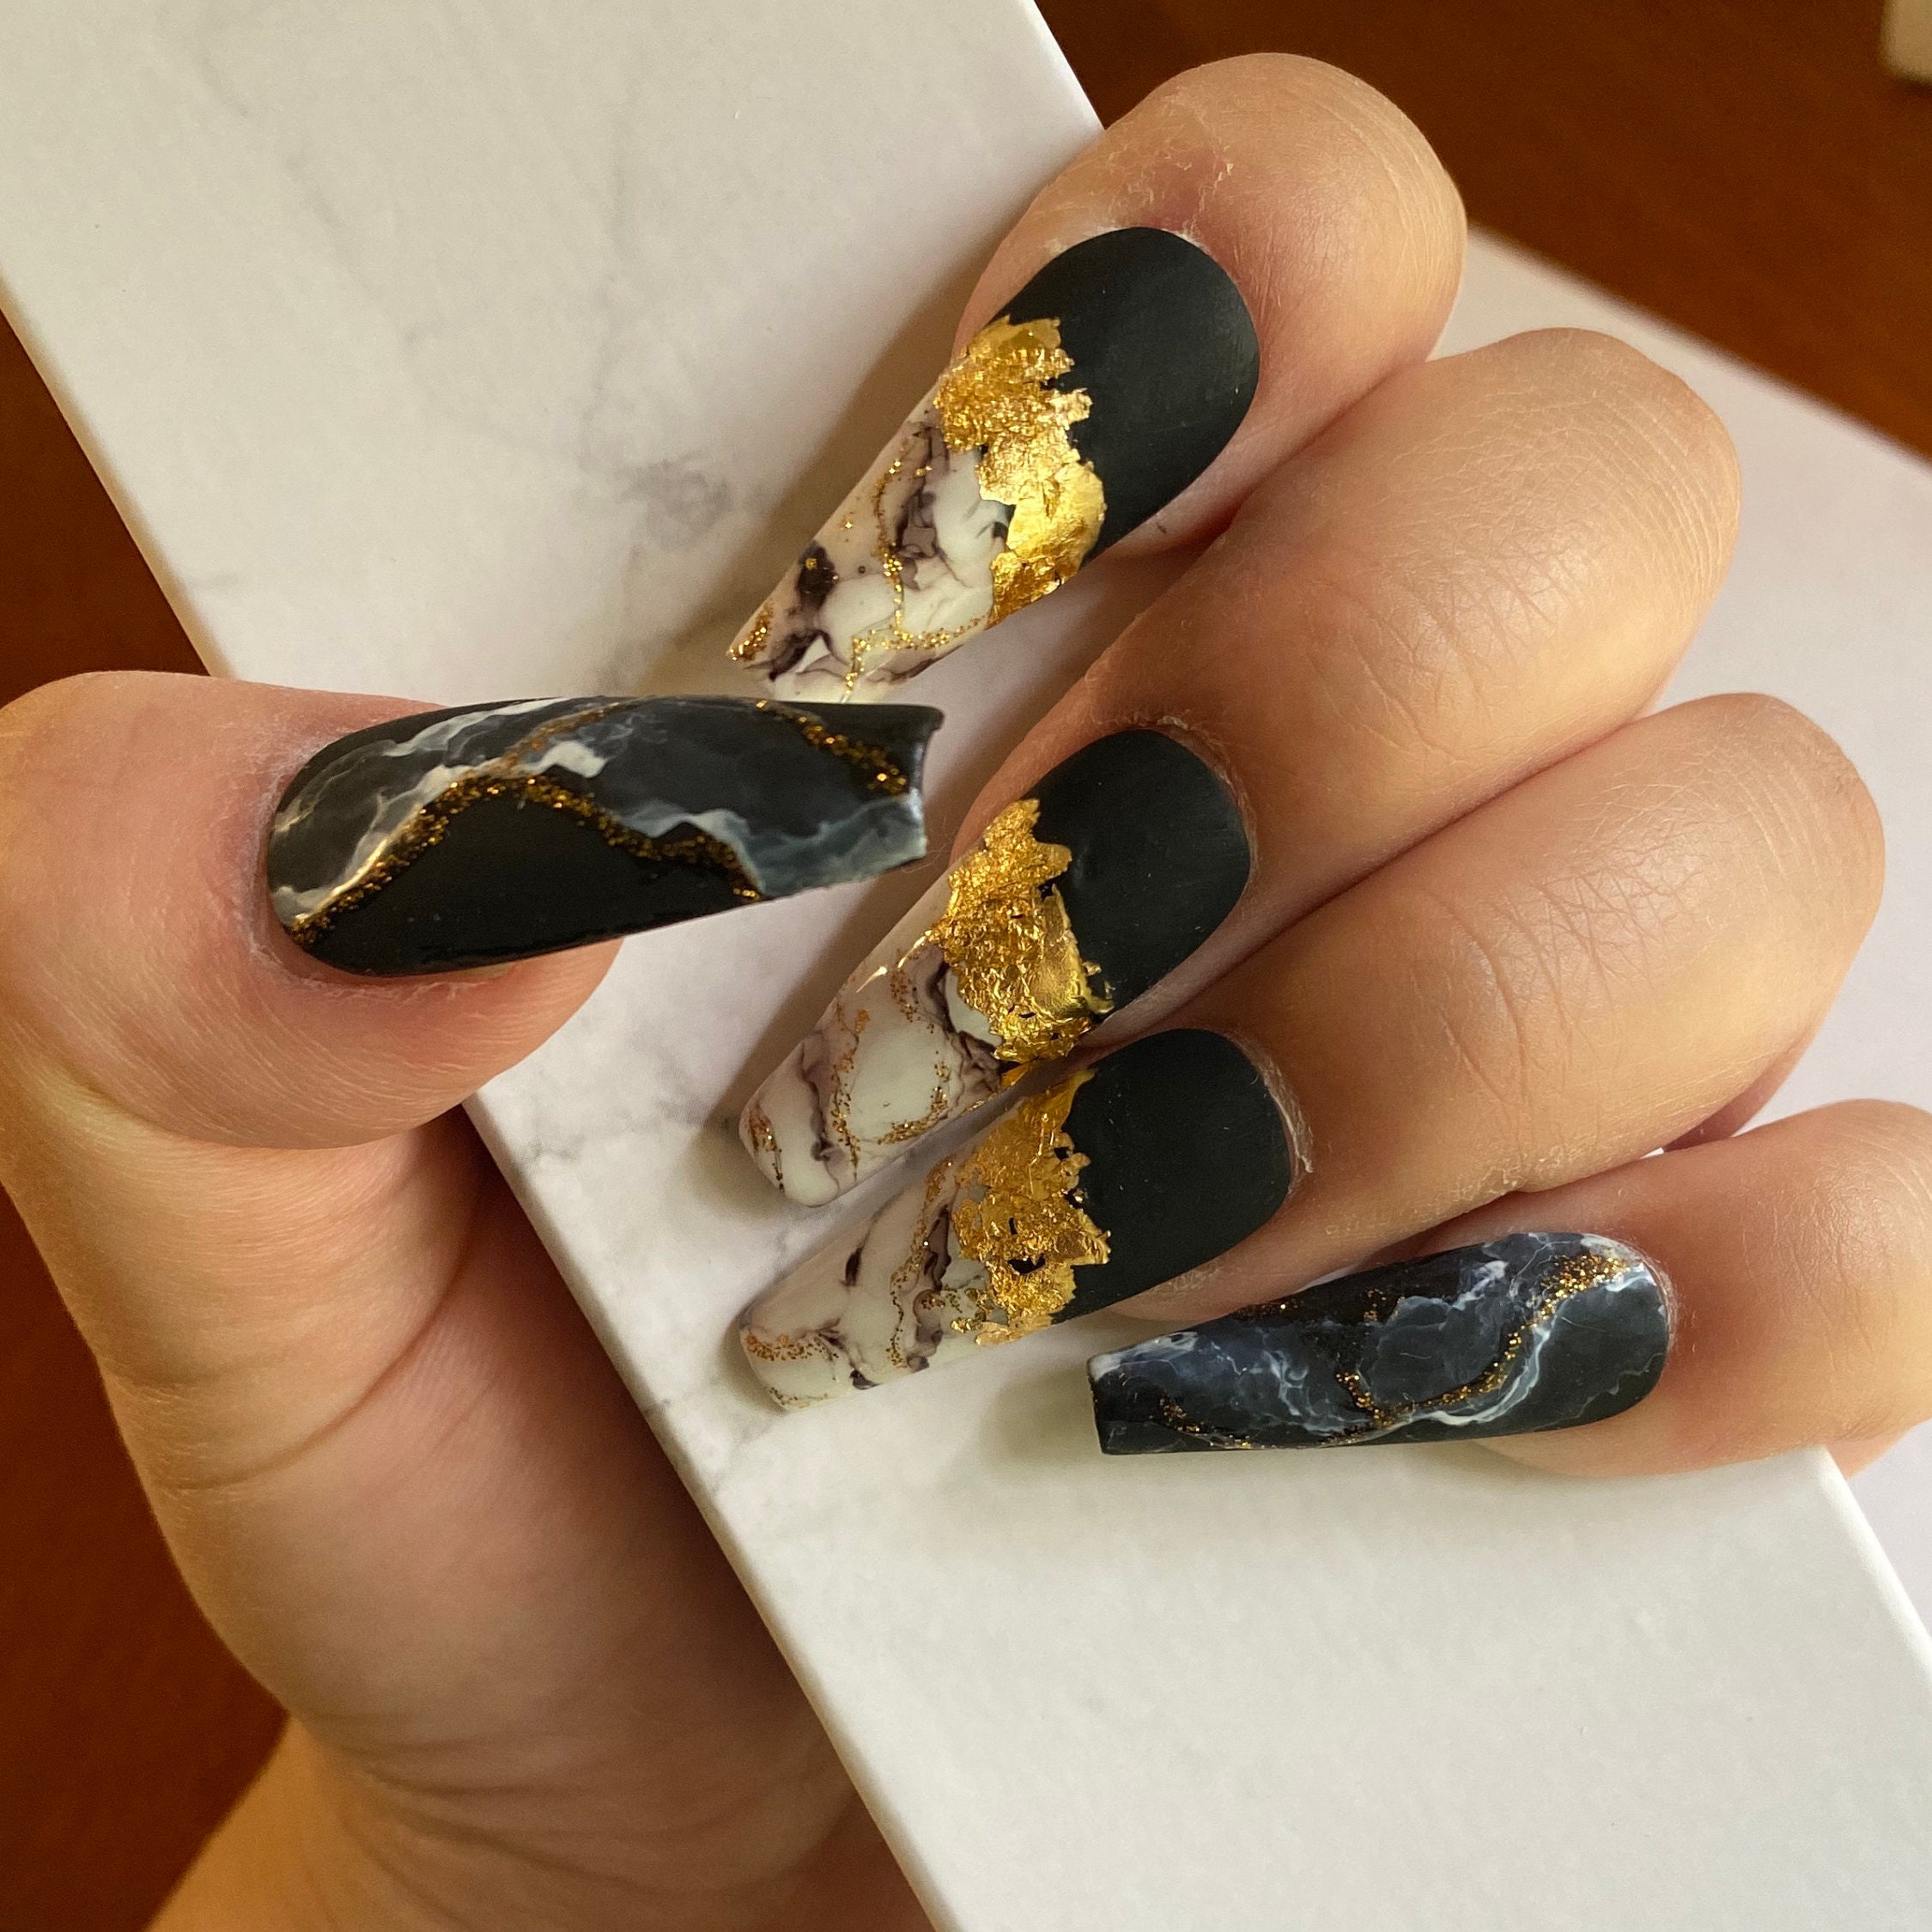

A glossy black base with gold veining creates a dramatic, high-fashion marble effect.
Creating the Design
Ideal for formal events or gothic-inspired looks.
Step 1: Prepare the Base
Apply two coats of jet-black polish and let dry.
Step 2: Create Gold Veins
Use a fine brush to paint thin, organic gold lines.
Step 3: Blend and Seal
Lightly blur edges with a sponge, then seal with a glossy top coat.
Finishing Touches
– Use marble on all nails or just accents
– Clean edges carefully
– Add an extra top coat for durability
Why It Works
The contrast between black and gold feels opulent and artistic, delivering a powerful statement manicure.
Dazzling Gold Glitter Ombre Glow

A soft nude base fading into gold glitter tips creates a glamorous ombre effect.
Creating the Design
Perfect for festive events or elevated everyday wear.
Step 1: Prepare the Base
Apply two coats of nude polish and let dry.
Step 2: Create the Ombre
Use a sponge to dab gold glitter from the tips upward.
Step 3: Build and Seal
Layer glitter gradually and finish with a glossy top coat.
Finishing Touches
– Add holographic glitter for depth
– Seal thoroughly to avoid texture
– Refresh top coat regularly
Why It Works
The gradient adds sparkle without overwhelming the look, balancing elegance with fun.
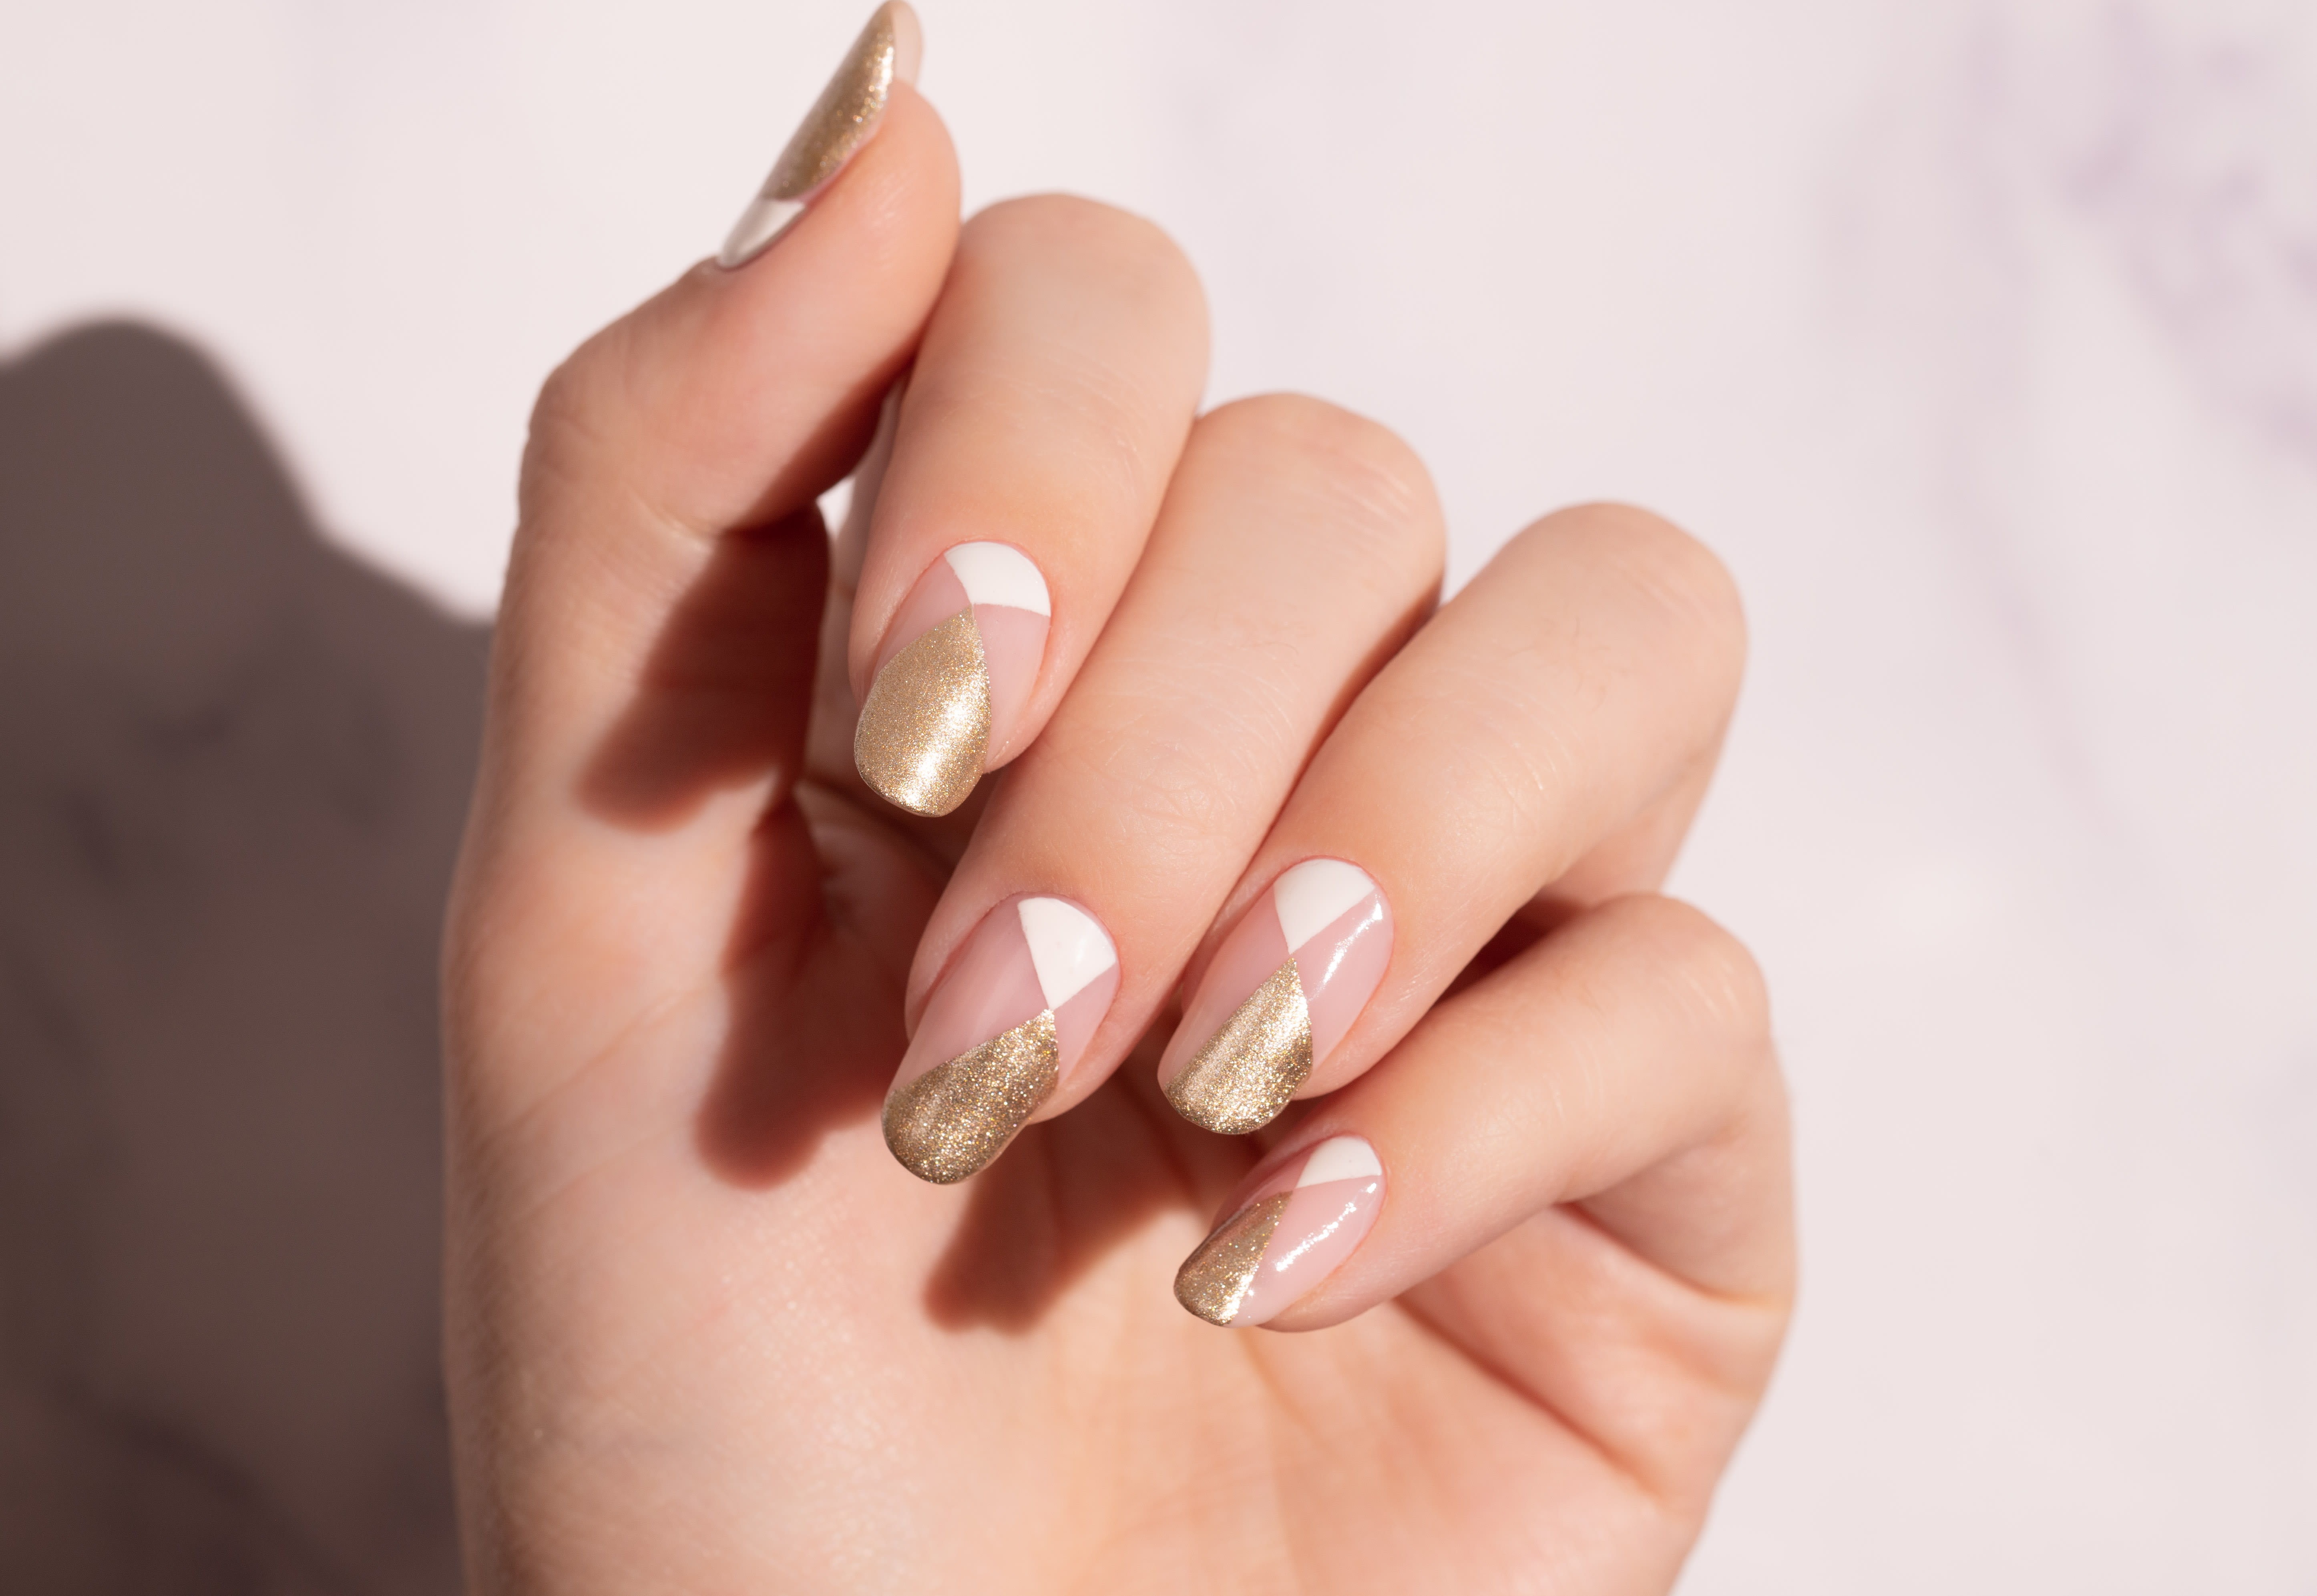
Elegant Gold French Tip Sophistication


A modern twist on the classic French manicure, featuring metallic gold tips.
Creating the Design
Timeless yet contemporary, perfect for any occasion.
Step 1: Prepare the Base
Apply a sheer pink or nude base coat.
Step 2: Paint the Tips
Use guides or a fine brush to apply gold polish cleanly.
Step 3: Seal the Design
Finish with a clear glossy top coat.
Finishing Touches
– Clean edges for precision
– Add fine glitter over tips if desired
– Almond or square shapes work best
Why It Works
Gold tips elevate the traditional French look into something chic and luxurious.
Edgy Matte Black with Gold Foil Accents
Matte black nails paired with shimmering gold foil create bold contrast.
Creating the Design
Ideal for evening wear or statement looks.
Step 1: Prepare the Base
Apply matte black polish and allow to dry.
Step 2: Apply Gold Foil
Press gold foil pieces gently onto tacky polish.
Step 3: Seal the Design
Finish with a matte top coat to secure foil.
Finishing Touches
– Scatter foil randomly or strategically
– Protect foil during wear
– Add gloss over foil for contrast
Why It Works
The matte finish amplifies the gold’s shine, creating edgy luxury.
Stylish Gold Chevron Tip Design

Sharp chevron tips in metallic gold bring geometric elegance.
Creating the Design
Modern and fashion-forward.
Step 1: Prepare the Base
Apply a nude or pale pink base.
Step 2: Create Chevron Shapes
Use striping tape and gold polish.
Step 3: Remove Tape and Seal
Peel tape before drying and apply top coat.
Finishing Touches
– Add studs along edges
– Seal thoroughly
– Almond or stiletto shapes enhance lines
Why It Works
The geometric pattern paired with gold feels bold, clean, and timeless.
Glamorous Gold and White Stripe Elegance


White nails with metallic gold stripes offer clean sophistication.
Creating the Design
Minimal yet striking.
Step 1: Prepare the Base
Apply white or pastel polish.
Step 2: Create Stripes
Use striping tape and gold polish.
Step 3: Seal the Design
Finish with a glossy top coat.
Finishing Touches
– Mix stripe thickness
– Add gold studs if desired
– Maintain shine with regular top coat
Why It Works
The contrast feels fresh, elegant, and endlessly versatile.
Daring Gold Studded Brilliance


Glossy nails adorned with 3D gold studs make a bold statement.
Creating the Design
Perfect for party-ready glamour.
Step 1: Prepare the Base
Apply base color and let dry.
Step 2: Place Studs
Use tweezers and secure with glue if needed.
Step 3: Seal the Design
Apply top coat around studs carefully.
Finishing Touches
– Align studs or scatter them
– Combine with foil or glitter
– Long shapes showcase studs best
Why It Works
The 3D texture adds drama and luxury, making this a true showstopper.
Shimmering Gold Chrome and Glitter Fusion


Alternating chrome and glitter nails create a multidimensional effect.
Creating the Design
Ideal for festive or bold looks.
Step 1: Prepare the Base
Use black bases for chrome and nude for glitter.
Step 2: Apply Chrome and Glitter
Rub chrome powder and layer glitter polish.
Step 3: Seal the Design
Finish with a glossy top coat.
Finishing Touches
– Alternate finishes for balance
– Add studs or foil accents
– Refresh shine regularly
Why It Works
The mix of textures adds depth, sparkle, and unforgettable glamour.